


Fender Deluxe Reverb Reisue
When it comes time for repairs and servicing, the Deluxe Reverb Reissue presents its own set of quirks. It’s very much a modern production amp, with all the compromises that implies. What follows is a brief overview of the common maintenance work, reliability updates, and a few well-chosen tweaks for those chasing a more authentic vintage amp-like response.
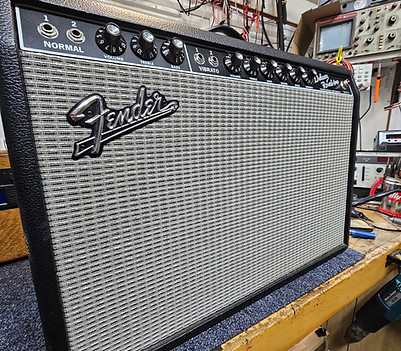
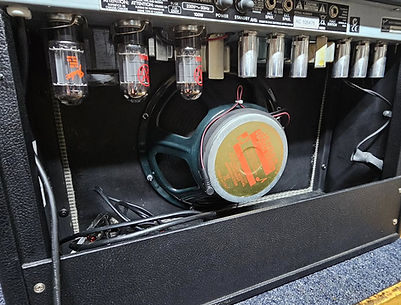
For pro’s and hobbyists alike, the Deluxe Reverb Reissue has an impressive reputation. It provides some classic Fender tones in a fairly compact form, at a volume that will be adequate for the vast majority of guitarists, without breaking either the bank, or their back. It’s a regular choice on stages, in studios, and in the backlines of hire companies who need something dependable that flatters just about any guitar you plug into it. The sound is bright, open, and dynamic in that unmistakable Fender way. Add to that the long-spring reverb and built-in vibrato, and you’ve got the classic sound that countless recordings were built on.

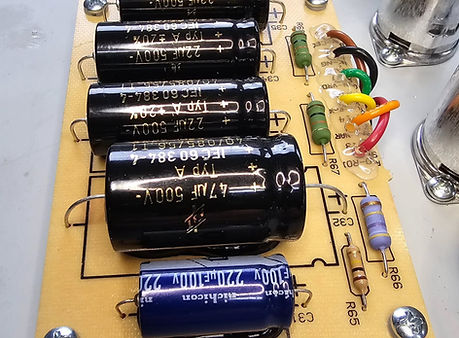
Filter Capacitors
The black and grey cylindrical components are the "electrolytic" filter capacitors, which filter out the AC "ripple" from the DC supply which provides the power to the plates of your valves. These ones are notorious for failing before their time, and when they do, they can cause multiple problems, such as increased mains hum from the speaker, reduced power, and even oscillation (squeals, overtones etc.)
At Surrey Audio Works, we prefer to replace these with very high quality German F&T and Japanese Nichicon brand capacitors.
On a Deluxe Reverb, they're underneath the chassis on a separate board in a "doghouse". On the main board are the capacitors for the bias supply, which should also be replaced, as their role is so crucial.
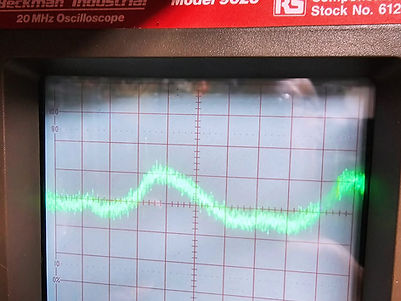
The Hiss Issue
There are multiple reasons why these reissue amps are not as quiet as their vintage ancestors, and are honestly one of the noisiest amplifiers on the market, brand new, straight off the shelf. The photo of the scope trace opposite shows about 20mV of mains hum on the output (which isn't too bad) but about 5mV of hiss sitting on top, which is a lot. It sounds many times worse when the vibrato is used, as it's so much more obvious.
The good news is that many of the root causes can be tackled, and the noise floor brought down to an acceptable level.
Lets have a little list, in no particular order;
1) "lead-dress", which is how the leads between the pcb and valve sockets are physically arranged and interract
2) Sensitive, high impedance, un-screened signal paths through long sections of the PCB, picking up interferrance
3) Agricultural channel linking (on the '68) adding noise to noise so it's twice as noisy!
4) Vibrato Opto-coupler emulation (worth mentioning separately)
5) Bright Cap Mod.
6) Gain structure.
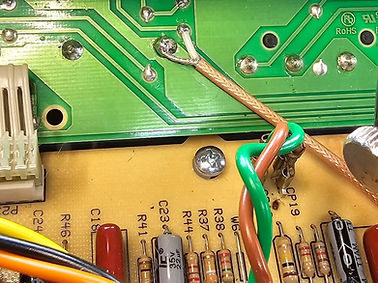
Minimising Interferrance
There's a particular trace on the PCB which connects the ouput of the Vibrato channel volume control, to the (very high impedance) input grid of a preamp valve. It travels a long way, completely un-shielded past all kinds of noisy stuff. We recommend cutting this trace out and installing a high quality braided screened cable.
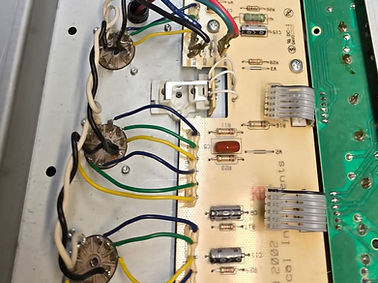
Just running wires from the pcb to the valve sockets "any old way" can be problematic. Wires carrying particular noise (such as the vibrato oscillator) right next to high impedance grid wires, can induce unwanted effects, like increasing hum and vibrato "tick". My preferred method is to look at the noise signal on the scope, and move things around until it is minimised.
The footswitch supply dropper resistor is replaced in the same way, for the same reason - you can see the discolouration beneath the board, where the original resistor had been cooking it, and below, what the overheating does to the pads.


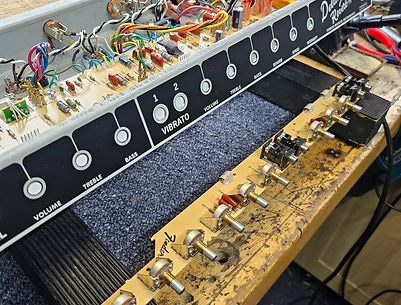
Vibrato Opto-coupler "Roach"
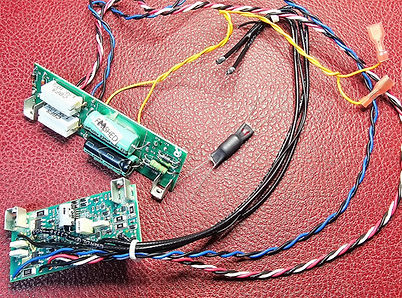

Many traditional Fender amps use a device called an opto-coupler, (sometimes called a "roach") to produce the vibrato effect. It's the black component in the middle of this picture, just under 2" long. The part of it call an LDR (Light-Dependant Resistor) contains Cadmium, which is banned in the EU under ROHS legislation . So amps sold in Europe have an opto-coupler emulation board instead, which consists of everything else in the picture. Probably more components than the whole of the rest of the amp, and a whole load of wiring too. Unfortunately whilst it's doing a fairly poor job of emulating and opto-coupler, it's also causing interference and noise. So we whip it all out and fit a proper opto-coupler Roach instead (just don't eat it). We also carry out the standard Fender service bulletin fix for "de-ticking" the vibrato - it makes a big difference.
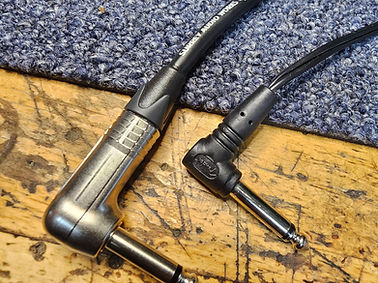
Speaker Jack Plug
The stock moulded jack plug is a show-spoiler waiting to happen. These cheapy connectors have a rivetted tip connection (which you can't see because it's moulded) which vibrates loose and eventually fails altogether. We replace them with a genuine Neutrik angled plug, The bit you solder to is the same piece of metal which forms the tip of the connector, so there's nothing to vibrate loose.
Tone Modifications

On the Hotrod amps for some reason, Fender chose some quite "un-Fenderish" component values in some parts of the circuit which are critical to the tone "signature" of the amplifier. Some of these deviations from standard Fender practice, align closely with many of the gripes that owners often have about the shortcomings of the sound of the amp. Surrey Audio Works have compiled a short list of some of the most popular modifications, which bring the tone circuit back to a more traditional Fender spec. They're not expensive to achieve whilst the PCB is out of the chassis, so why not give the amp it's best chance. We always have excellent feedback from customers about their upgraded amps, which is very rewarding to hear.
Is It Worth It? Well, Yes It Is!
I know what you're thinking - and yes, this is a lot of work, but it can transform the amp into a super-dependable, trustworthy tool of your trade. Please don't compare the cost of repairs to second hand Hotrod prices - all those Hotrods on ebay and Facebook Marketplace, will need most or all of these jobs doing. Actually, buying an older Hotrod, second-hand, and having it refurbished by Surrey Audio Works, is a cost-effective way to buy one, which will be a considerably superior machine compared to a brand new one! Spend the money you save on a posh speaker for it. 😃
Surrey Audio works have completed dozens of Hotrod amps for all kinds of players, who have been delighted with the work - just check some of our Google reviews!
So don't leave your faulty or unreliable Hotrod amp in the cupboard - get it to Surrey Audio Works for a service / refurbishment / revitalisation - we bet you won't regret it!